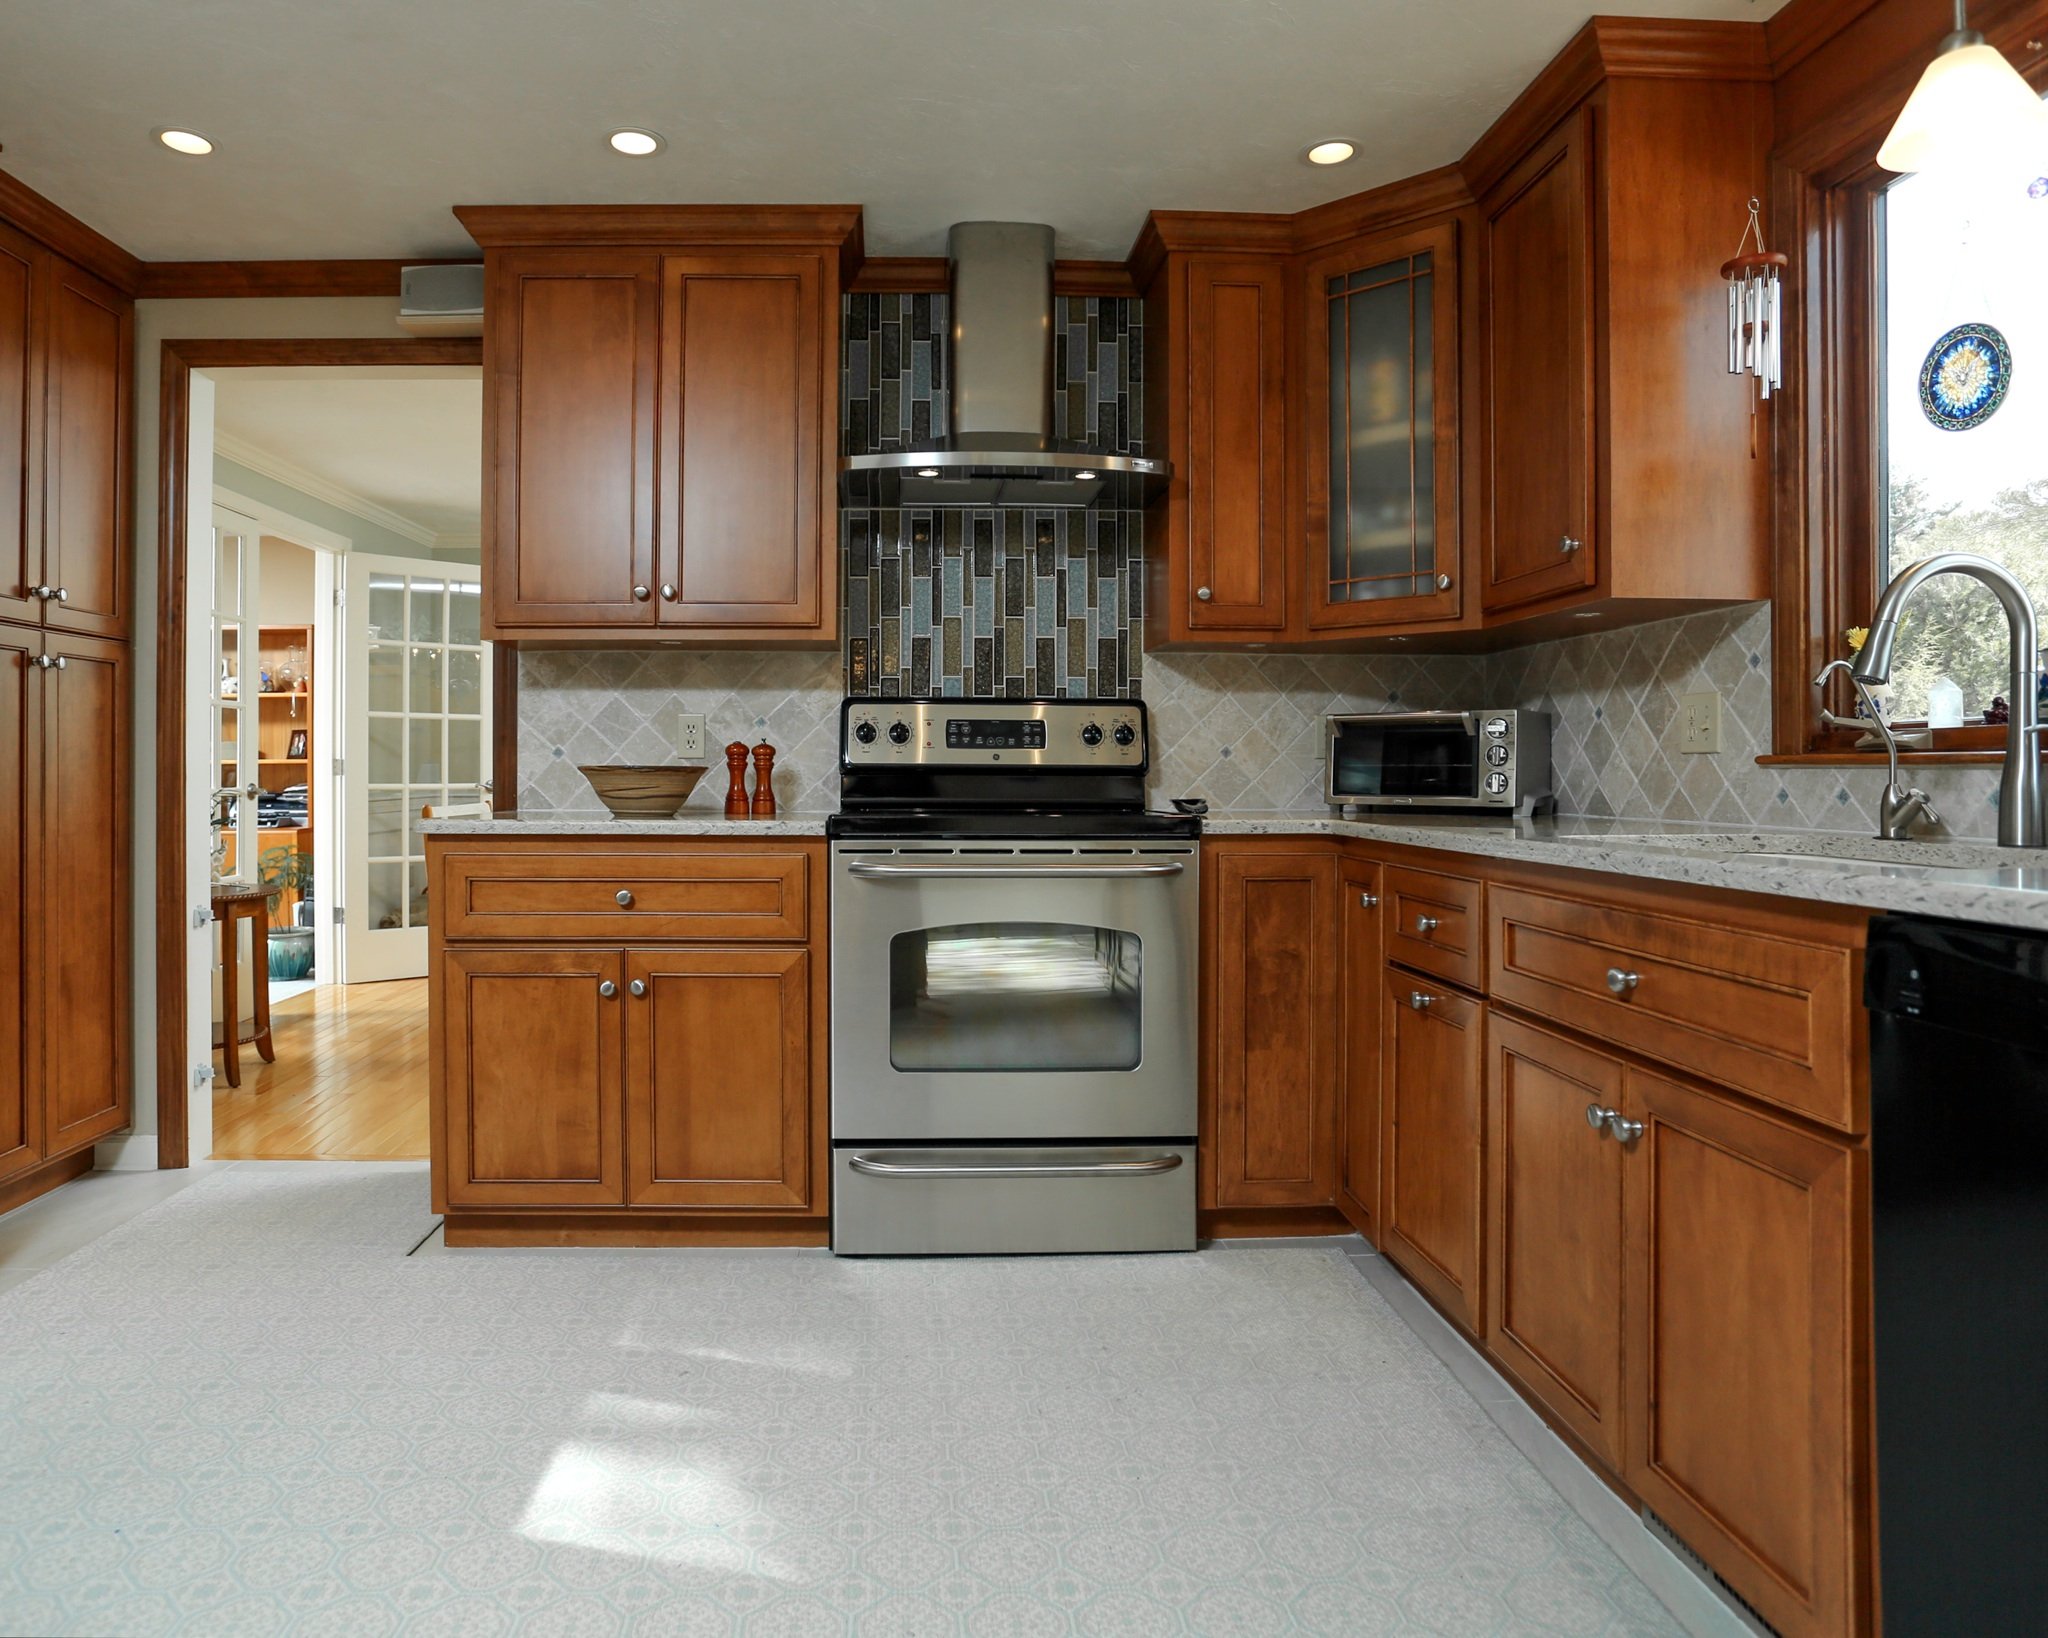
How Do You Put Crown Molding On Kitchen Cabinets - The Easiest Way To Install Crown Molding On Cabinets / If you have unfinished crown molding, you will need to paint or stain it now.
How Do You Put Crown Molding On Kitchen Cabinets - The Easiest Way To Install Crown Molding On Cabinets / If you have unfinished crown molding, you will need to paint or stain it now.. If you have frameless cabinets, adding a panel to the side of the taller cabinet that's flush to the face of. Calibrate your miter saw to 90 degrees, and cut your molding to size. Cut the molding the number one trick to cutting inside and outside corner crown molding is to cut each piece upside down with the ceiling side on the bottom and the wall side on the top (image 1). Make sure you secure the woodblock to the cabinet first and then nail the crown molding to that. You will need to do a 2 piece molding application:
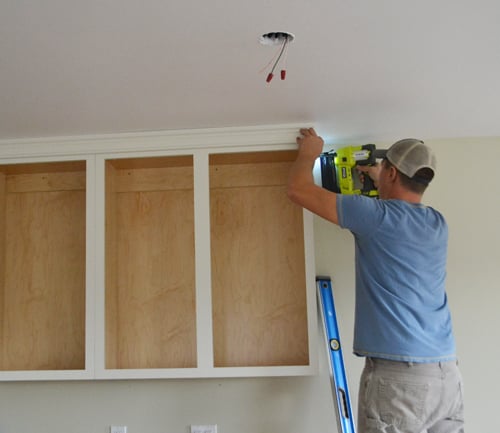
When installing the top of a cabinet, space the finish nails about 12 to 16 inches apart. How to cut & install crown moulding. Hold up the crown molding on the sides of the cabinet. Crown molding can now be nailed to the front piece of the scrap wood. Before nailing the kitchen cabinet crown molding pieces in place, test fit them to make sure the angles line up along corners.
Stacked And Stepped Crown Molding Cabinet Improvements from blog.kitchenmagic.com These filler wood pieces should be held with screws on the top of the cabinets. You will need to do a 2 piece molding application: Put the moulding against a framing square, noting the distance between the face of the moulding edge and the corner. Crown molding can now be nailed to the front piece of the scrap wood. It is usually better to do this before you put it up on the cabinets so that you do not get any paint on them. Before nailing the kitchen cabinet crown molding pieces in place, test fit them to make sure the angles line up along corners. Molding added to the home provides a finished look. Check out our video review and demo of adding crown molding to your kitchen cabinets.
Step 6 fill in the nail divots and joints
Use a pin nailer to nail into the corners of the two pieces of crown molding (image 2). Step 6 fill in the nail divots and joints Cut a molding strip at least 8 inches longer than the length of the front of your cabinet. The second trick is to set the molding against the saw and mark a line on the table with a pencil (image 2). There is just enough depth at the fascia above the corner cabinet to land the lower level crown cleanly into the side. Molding added to the home provides a finished look. Cut a scrap of lumber to the correct dimension and draw layout lines on the wall and ceiling. For the front filler piece, drill from underneath the inside of the cabinet, and then secure that piece with wood screws. Ask this old house general contractor tom silva installs crown molding on kitchen cabinets with full overlay doorssubscribe to this old house: Then, use a molding adhesive to hold the crown molding in place as you fasten it with 18 gauge finish nails. Then stand back and look at your crowning achievement. When installing on a wall, use the pneumatic nailer to secure the crown molding at the wall studs. These filler wood pieces should be held with screws on the top of the cabinets.
With cabinets with face frames (as opposed to european style cabinets), the face frame sticks our past the side of the cabinet about 3/16 of an inch. Jeff huynh, the general manager of handyman rescue team, says: Check out our video review and demo of adding crown molding to your kitchen cabinets. The first piece needed is the carrier molding. How to cut & install crown moulding.
Kitchen Crown Molding Installation The Last Piece Goes In The Joy Of Moldings from i1.wp.com For more information, visit www.titebond.com. Put the moulding against a framing square, noting the distance between the face of the moulding edge and the corner. Be sure the pieces are tight against the wall. Ask this old house general contractor tom silva installs crown molding on kitchen cabinets with full overlay doorssubscribe to this old house: Cut a molding strip at least 8 inches longer than the length of the front of your cabinet. There is just enough depth at the fascia above the corner cabinet to land the lower level crown cleanly into the side. From the sides of the cabinet, nail the filler pieces in the place. When installing the top of a cabinet, space the finish nails about 12 to 16 inches apart.
You can add molding to your cabinets in the same way you would install molding on your wall.
You can add molding to your cabinets in the same way you would install molding on your wall. Cut the molding the number one trick to cutting inside and outside corner crown molding is to cut each piece upside down with the ceiling side on the bottom and the wall side on the top (image 1). Crown molding can now be nailed to the front piece of the scrap wood. Unless there is ample room above the doors to attach a crown molding, or if you are using a very wide crown molding, you will need to install a nailer strip to support the installation. Why would you do that? You can use 1 x 4 lumber, and rip these into two or three strips. Diy used scrap wood and nailed it to the top of the cabinet. In this video we will go over some tips and tricks that might help whe. Hold the crown molding in place and then nail it in to the wood strips using a nail gun or hammer. Jeff huynh, the general manager of handyman rescue team, says: From the sides of the cabinet, nail the filler pieces in the place. Well, for crown molding it can pay to measure twice and cut four times. You will need to do a 2 piece molding application:
I attached the crown molding to the ripped down 1x6 with 3/4 brads. Using a nail gun, nail the crown to the baseboard. How to add crown molding to your kitchen cabinets: In this video we will go over some tips and tricks that might help whe. It's a good idea to cut the corner angles first, then measure the rest to fit.
Adding Crown Moulding To Wall Kitchen Cabinets Momplex Vanilla Kitchen Ana White from www.ana-white.com Start by assessing the cabinets. Jeff huynh, the general manager of handyman rescue team, says: There may be times when nailing is prohibitive, in which case you can install molding without nails using construction grade adhesive. You can also notch them so the bottom of the angle will sit completely flush with the front of the kitchen cabinets. Begin placing moulding against the wall opposite the door. Put the moulding against a framing square, noting the distance between the face of the moulding edge and the corner. Molding added to the home provides a finished look. The second trick is to set the molding against the saw and mark a line on the table with a pencil (image 2).
Start by assessing the cabinets.
Using a nail gun, nail the crown to the baseboard. Why would you do that? Moulding).usually the angle will be around 35 degrees. It is usually about 1.5 tall. Dry fit the crown molding by holding the front piece and a side piece against the front and side of the baseboard (image 1). Before nailing the kitchen cabinet crown molding pieces in place, test fit them to make sure the angles line up along corners. If you have frameless cabinets, adding a panel to the side of the taller cabinet that's flush to the face of. Be sure the pieces are tight against the wall. Cut a molding strip at least 8 inches longer than the length of the front of your cabinet. Step 6 fill in the nail divots and joints Jeff huynh, the general manager of handyman rescue team, says: Next the crown molding is attached to the carrier piece. (use one long strip for a row of cabinets the same depth.) then apply wood glue to each strip, nail it in place, and let dry.